Video ads on Linkedin are a significant tool to add to your marketing belt. Read on for an explanation of how to set up a Linkedin video ad today.
Linkedin’s potential for high-quality leads is its hidden gem. Used correctly it can help you reach the people who can make important company decisions. But how do you get started?
Step 1:
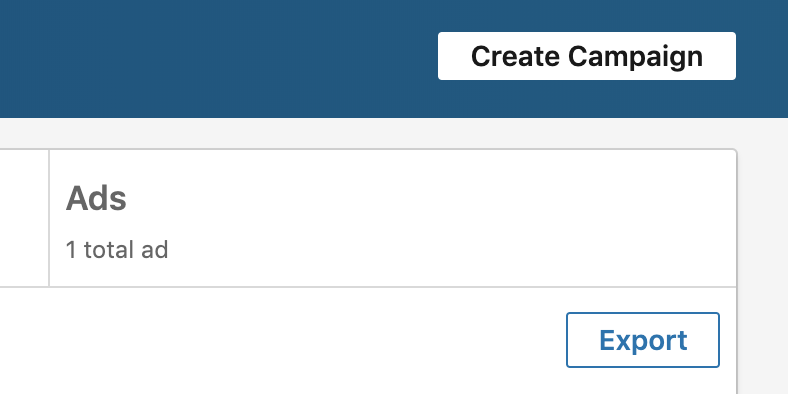
Begin by logging into your Linkedin Campaign Manager account. If you haven’t one set up, you will be prompted to create one to begin. Click the ‘Create Campaign’ button in the top right of the page.
Step 2:
You’ll be directed through to the objectives screen. Here Linkedin outlines for you the various options you have in order to meet your goals. These are represented under headlines that outline the classic buyer’s journey trio: awareness, consideration and decision.
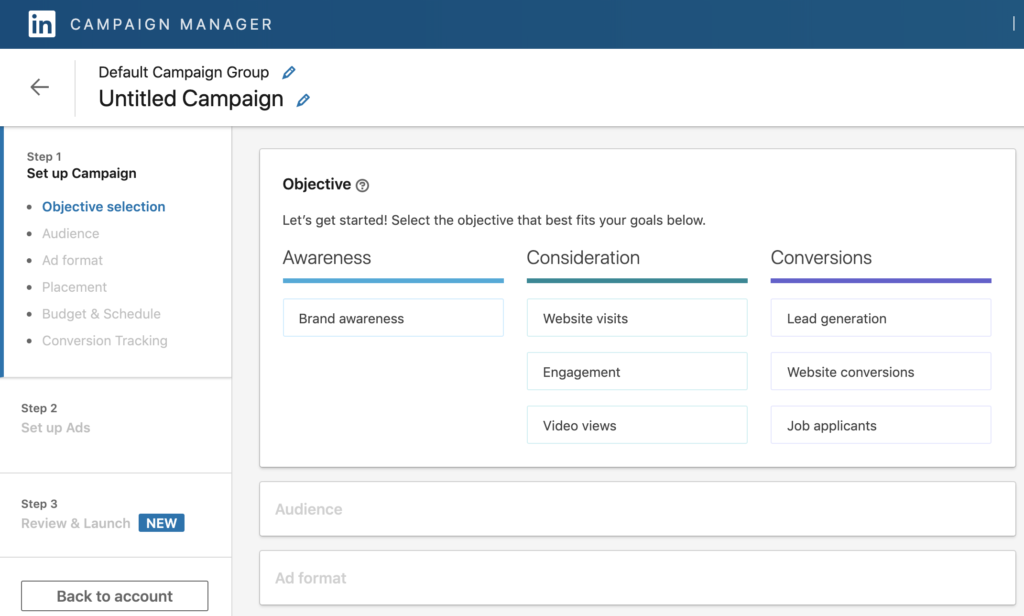
This is an important decision to make, but know that video format ads are available for all of these objectives.
Step 3:
After clicking your chosen objective, you’ll be directed to choose who you want to target with your video ad. This is another crucial decision to make in your journey to an impressive Linkedin video ad launch.
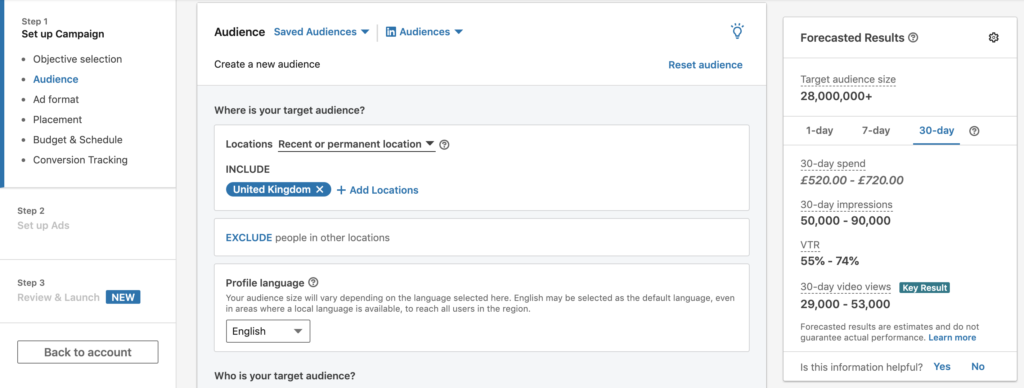
Linkedin’s real strength is here in the audience selection. It allows you to get real specific, real fast with easy to use, intuitive categories. It has basic targeting by demographics and location similar to most major social media platforms, but it also has business-specific targeting options. These options include; job title, industry, experience, education, and interests.
Perhaps the most interesting aspect to take a look at is the ‘Company Connections’ option. This allows you to target people who are first degree connections to employees of specific companies. You never know which one of those employees have a great relationship with the CEO. This offers you a potential way to reach someone you may otherwise never reach.
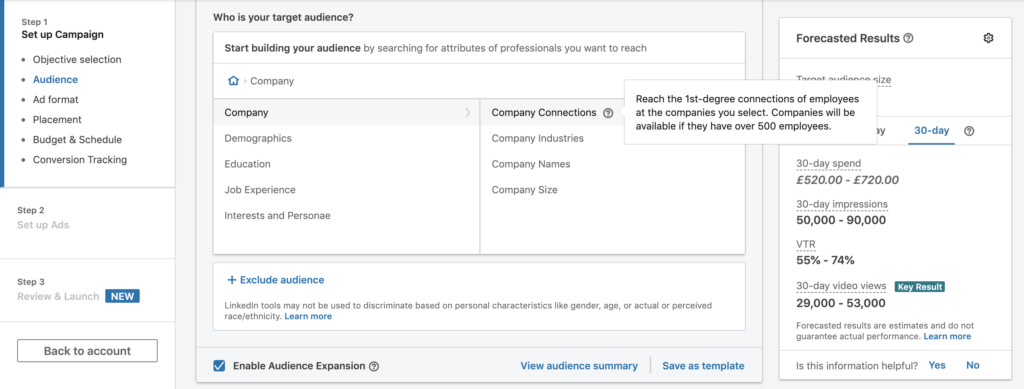
Look out for the ‘OR’ and the ‘AND’ functions. These allow you to refine your search even further.
The ‘AND’ function lets you target people who have several of the attributes to choose from. This allows you to be a lot more specific, helping you make your video ad more contextual and ultimately more effective.
The ‘OR’ function allows you to broaden your audience range to make sure you are reaching a more diverse audience if that is what you require.
There is also an ‘EXCLUDE’ button. This can be very useful in helping you to rule out any audience that you think you’ll be wasting your time targeting.
Note: the ability to exclude people based on their age and/or gender have been disabled by LinkedIn. This has been done in an attempt to stop ad targeting discrimination based upon characteristics that are protected.
Step 4:
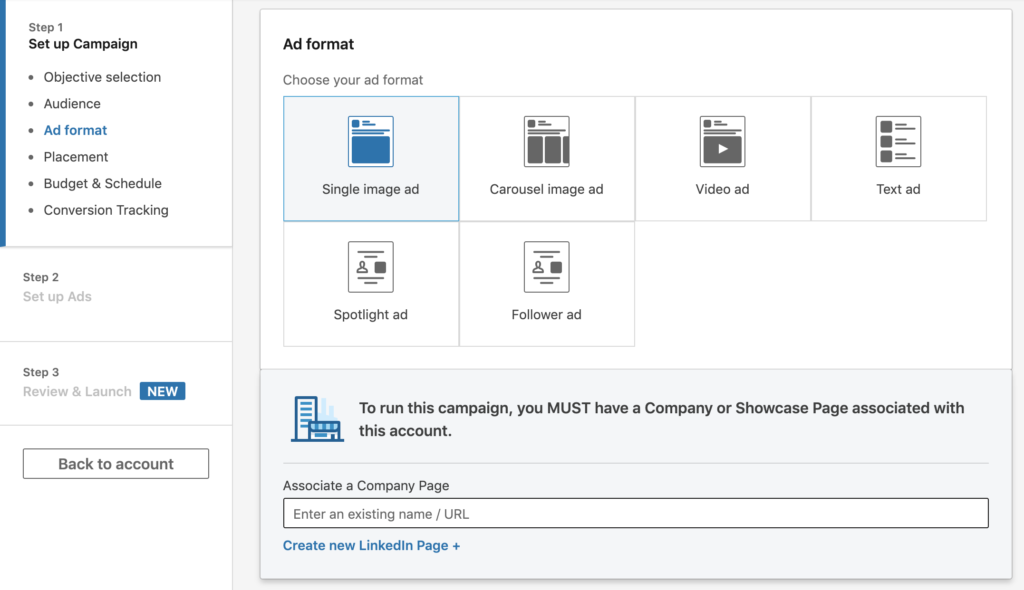
Once you’re done with the correct targeting of your audience, you need to scroll down to the ‘Ad Format’ section. This next section will offer you six format options or just one if you chose ‘Video Views’ as your objective. Click the ‘Video ad’ option to continue.
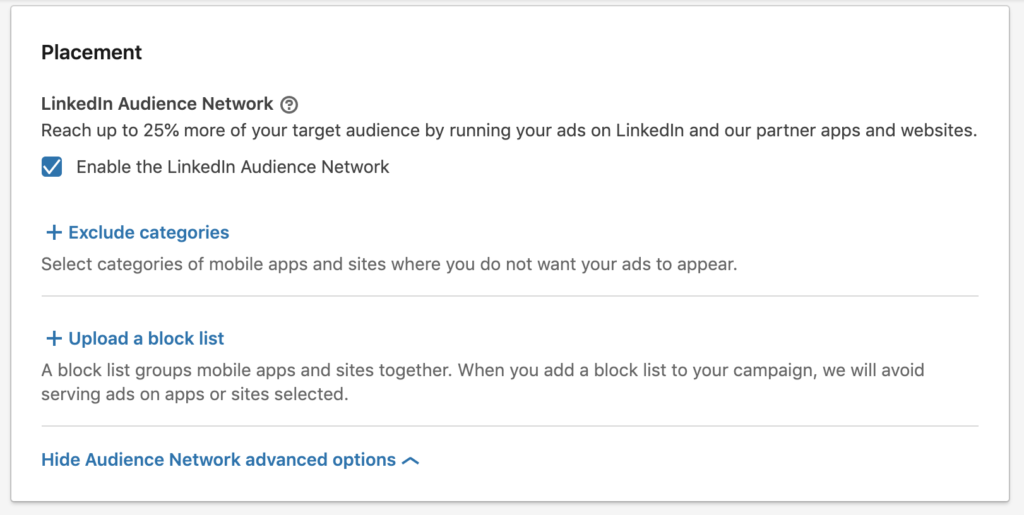
Another option that appears in this section is the ability to share your video ad with the ‘Linkedin Audience Network’.
Using this basically allows you to place your ads into external apps outside of Linkedin. You can restrict Linkedin from sharing your ad in specific third-party apps as well as apps that fall within a certain category.
Later, once you have launched your video ad you will also be able to download a report of the performance of your ad in the Linkedin Audience Network.
This capacity to share with third parties through Linkedin is a feature only currently available for single image ads and video ads, so make the most of its exclusivity.
One thing to note here is that some of the ad formats require you to have a company Linkedin page set up.
Step 5
Below the ‘Placement’ section you will find the ‘Budget and Schedule’ section. Here you can choose a bid type, enter in your ad campaign budget and make a campaign schedule.
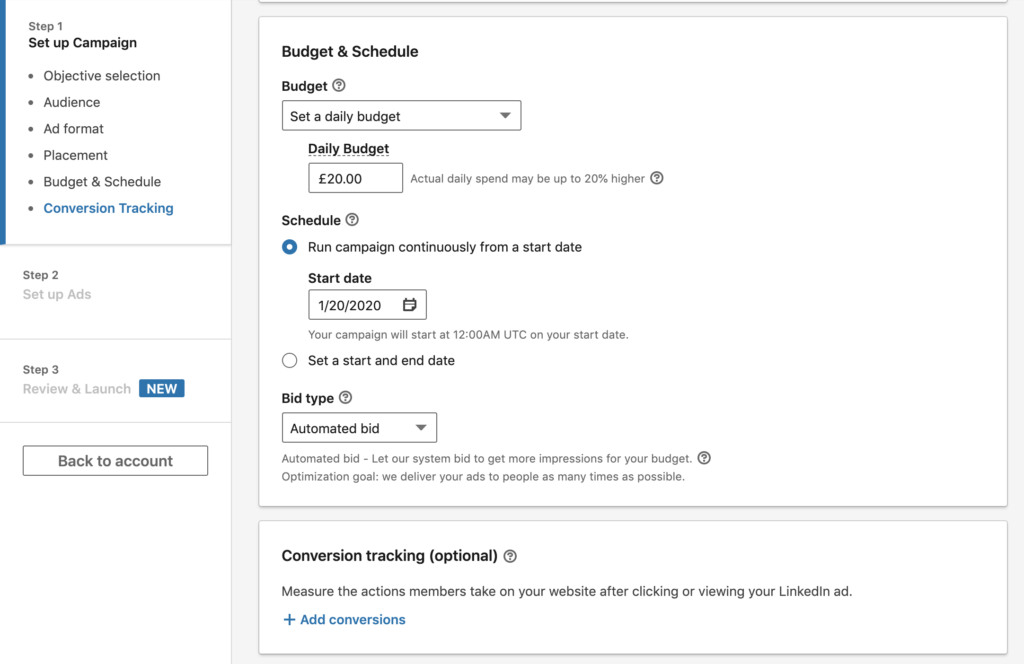
The first option to address is the budget. Set either a daily budget or set both a daily budget and a total budget. Having a total budget can offer some assurance that you won’t end up paying a lot more than you expect to.
With the daily budget, a key point to note is that when your video ad reaches its spend limit for the day there may be a short period of time when the ads will continue to run.
Unfortunately, this is not a generous gift from Linkedin. You can be charged up to 20% extra per day for this delay in ads stopping and this is all based on the additional clicks or impressions your video ad receives during that time.
So, when you set your daily budget, remember to be comfortable spending up to 20% more than that budget.

The second option you now have is when to schedule your video ad campaign to start and end. You can choose to have the ad begin as soon as you finish the ad creation process or you can choose a date sometime in the future. Similarly, you can choose a specific end date for the video ad or you can choose to run your campaign continuously.
The start time for ads if you choose a future launch date will be 00:01 am of your day of choice. If you have chosen an end date the time your campaign will end will be the midnight that marks the end of that day.
The third option is your choice of bidding type for your video ad. Here you need to be clear on what your goals are for your ad. If you want to focus mainly on maximising the clicks within a certain budget then the ‘Automated bid’ is a good option. Linkedin utilises its historical data to put your video ads in front of the people most likely to engage with them. Selecting this will mean that you will be charged by impression but bear in mind that you won’t be able to select a bid cap.
If you want to be able to set a maximum you are willing to bid, then choose the ‘Maximum Cost-Per-Click’ option. This allows you to set a bid cost that you deem worthwhile for the result it gets your business. The ‘Enhanced CPC bid’ also allows you to bid on cost per click. This option is automatically optimised by Linkedin to reach those who are more likely to engage with your ad.
Note: Another useful feature here is the tracking of the actions of your audience after they click links on your video ad.

Step 6:
Click save and continue to the ‘Set Up Ads’ section. Here you can finally bring the video ad to life. You can browse for any pre-existing video content you have on your Linkedin page. Or you can click the ‘Create new ad’ button.
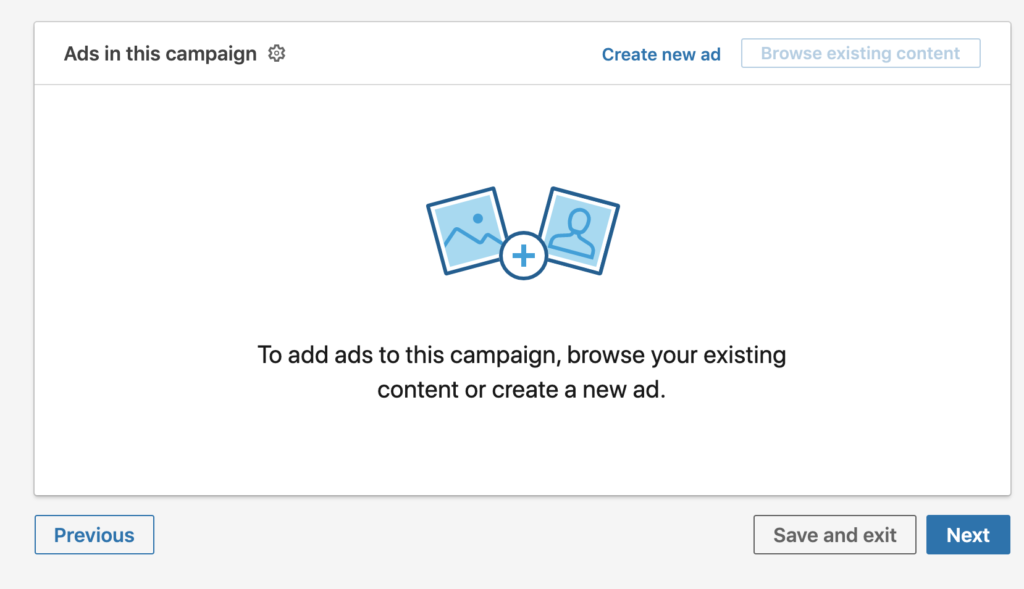
The pop-up screen now will enable you to build your ad. Give it a name, an introductory text, a URL that you want people to click through to and add a headline to accompany your video.
Import your video here and observe the mobile and desktop previews to the right of the screen to make sure your video ad looks exactly how you want it. If you have any issues with this make sure that your video ad specs are aligned with Linkedin’s requirements.
Be sure to choose an appropriate call-to-action before clicking ‘Create’. From there you’ll see the pop-up screen close and your video ad being processed.
Click ‘Next’ to review your entire video ad campaign.
Content with the overview? Filled out any essential billing info? Then you are ready to hit the ‘Launch Campaign’ button.
You’re all done!
As soon as Linkedin approves it, your new video ad will be live.
Just watch from the Campaigns Manager dashboard to track its performance and see some tangible results for your business.
Plus of course, if you’re in need of some quality animated (or filmed) content to share on LinkedIn to promote your business brand, products or services. Our award-winning UK animation studio is on hand to help, check out pricing here.
