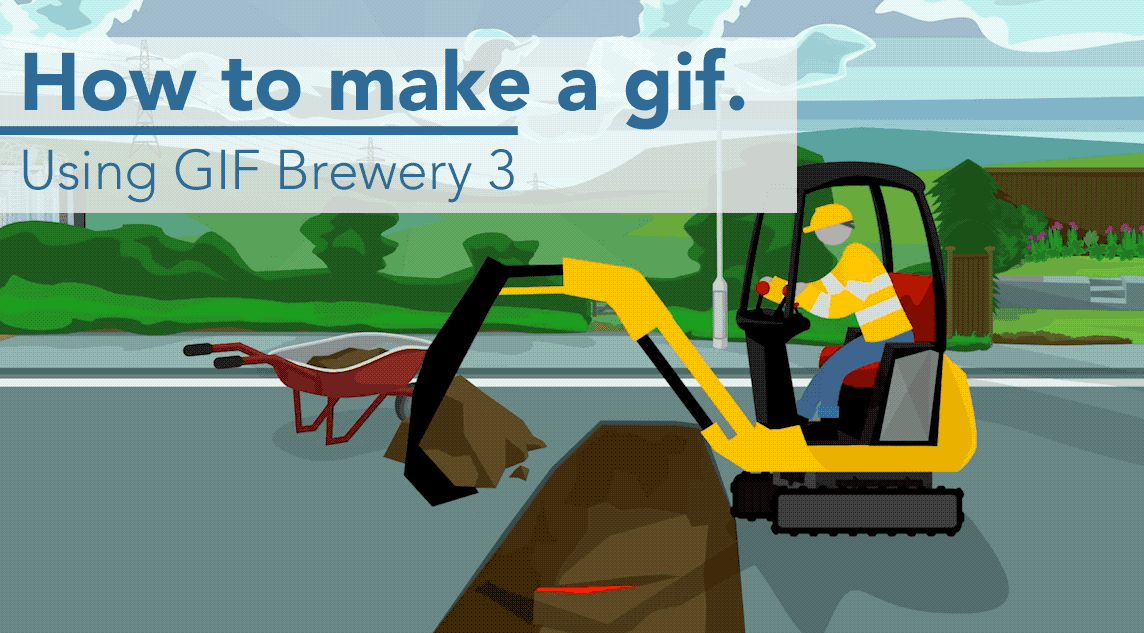
Creating gifs in a social media age of memes and fast-paced content is an essential tool to learn. It’s great for business use, and for engaging online.
In this walkthrough, we’ll make use of Gif Brewery 3 on your Mac. A powerful but intuitive gif maker. Plus it’s free.
Read and learn exactly how to use a gif maker.
Gif Brewery 3 is ideal for creating quality gifs. It is intuitive, powerful and functional with a whole lot of interesting features for you to make use of. Download it from the Mac app store and let’s begin utilising this excellent gif maker. A perfect tool for business and social media.
We use Gif Brewery for our animation studios own character and techy gif video creations. They’re great at allowing us to provide Gifs for clients, plus bring pages of our website and emails to life quickly.
Let’s get started on how you can make your own animated gifs.
The intro screen:
You’ll be met with a clean introduction screen that looks like this:
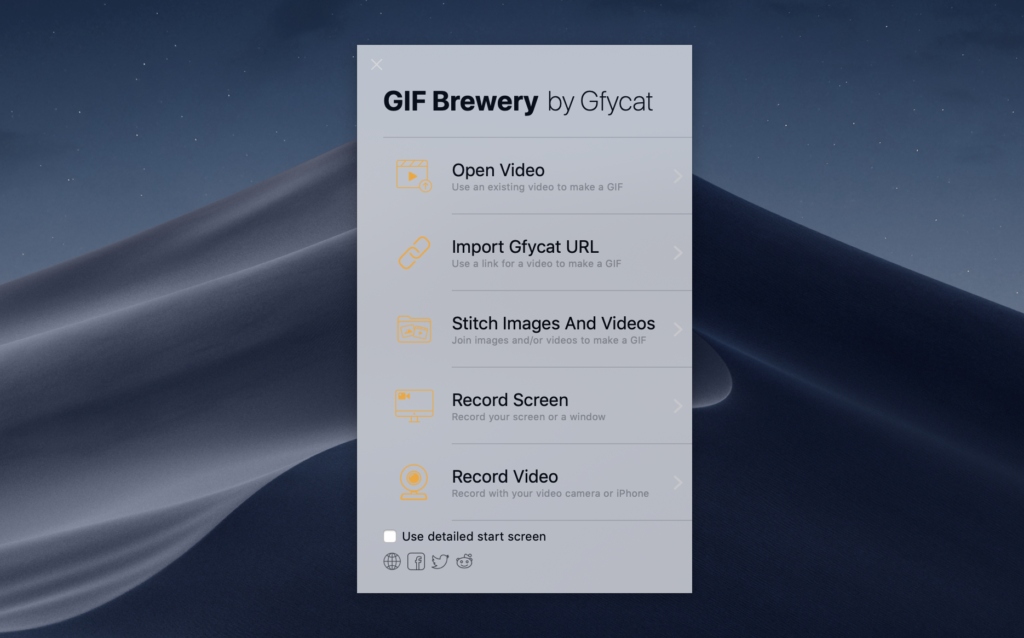
Here Gif Brewery offers you a range of ways for you to import the media you want to make a gif out of. Let’s take a look at each of them.
The first function is to open a pre-existing video you have on your computer. This is the option we will pursue in this tutorial, so more on this in a minute.
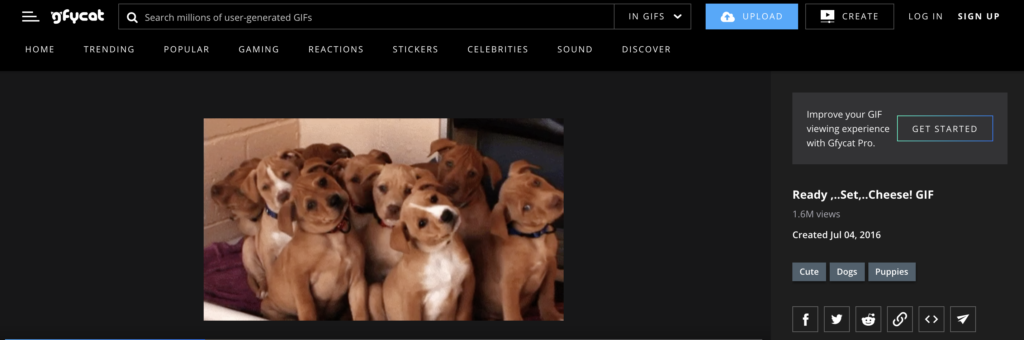
The second option is to import a URL from ‘Gyfcat’ of one of the many thousands of gifs they have on their website. This is great if you want to edit pre-existing gifs. This can be useful for many reasons, for example, if someone in your social media community audience has commented on your post with a gif that you can find on Gyfcat. You now have the opportunity to respond in a very contextual and personalised way by taking their gif and editing it with a response for them. A great way to build rapport with your social media audiences.
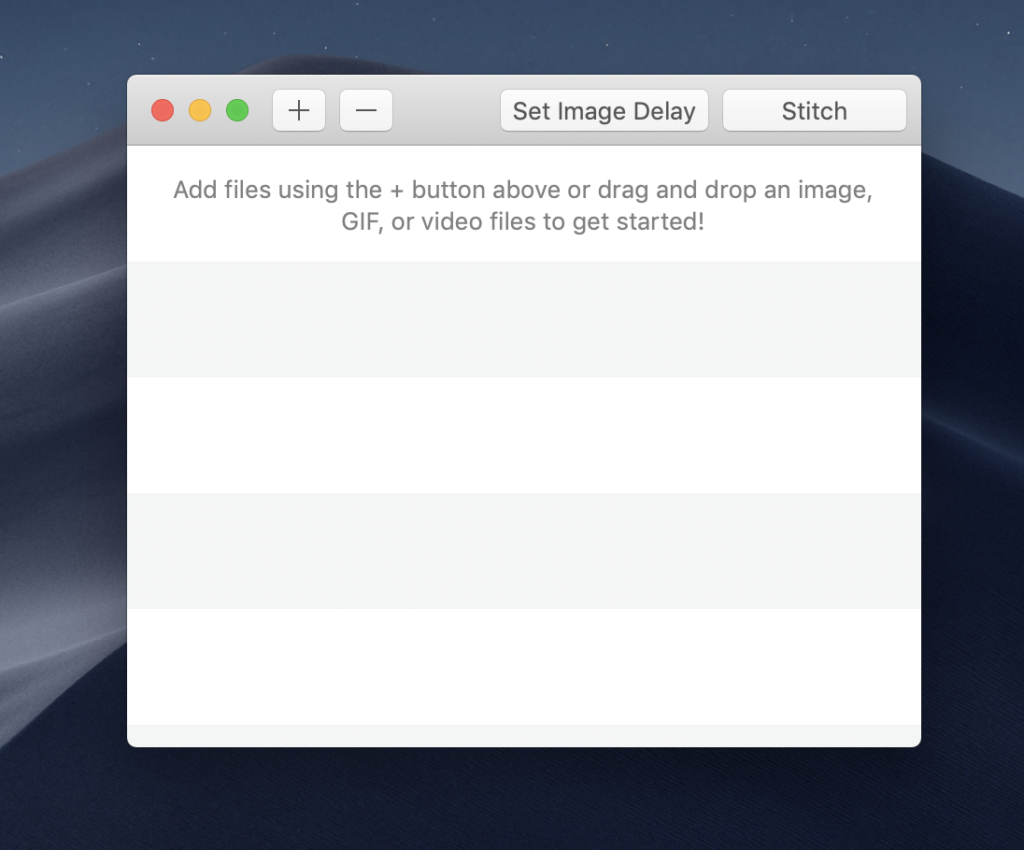
The third option is best for if you want to ‘stitch’ images and video together in your gif. When you click through this option you get to import multimedia files, arrange them in whatever order you like and choose the image delay (or in other words the amount of time they will be shown for in your gif).
The four option is to record the content for your gif straight from your mac, either by recording your whole screen, or just a chosen area of your screen. This is great if you want to make a gif made up of just a few seconds of a long-length video. It means you don’t have to worry about downloading huge files onto your mac and can be very specific about which part of the video you would like in the gif.
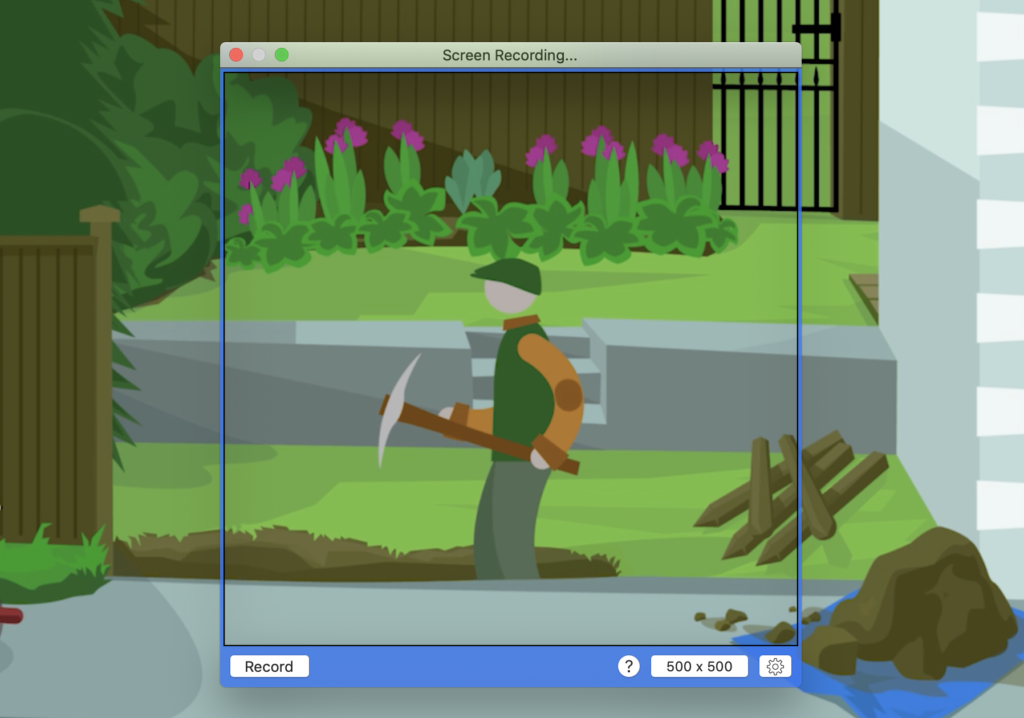
There are a few great little features here too. Make good use of the ability to set a timer, the choice to record audio as well and the option to include your cursor movement and/or clicking in the gif.
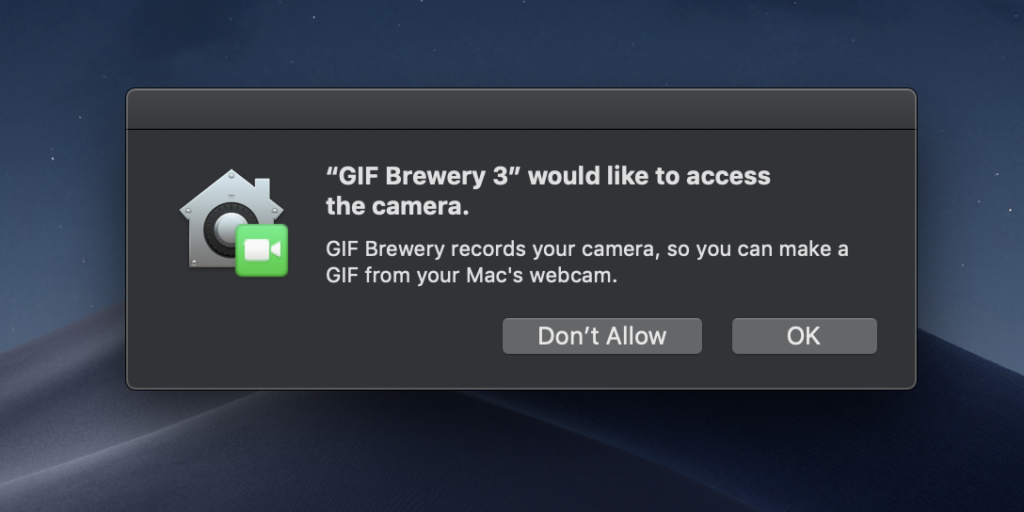
The last option allows you to record the video for your gif straight from your computer camera or even your phone camera. The choice is yours.
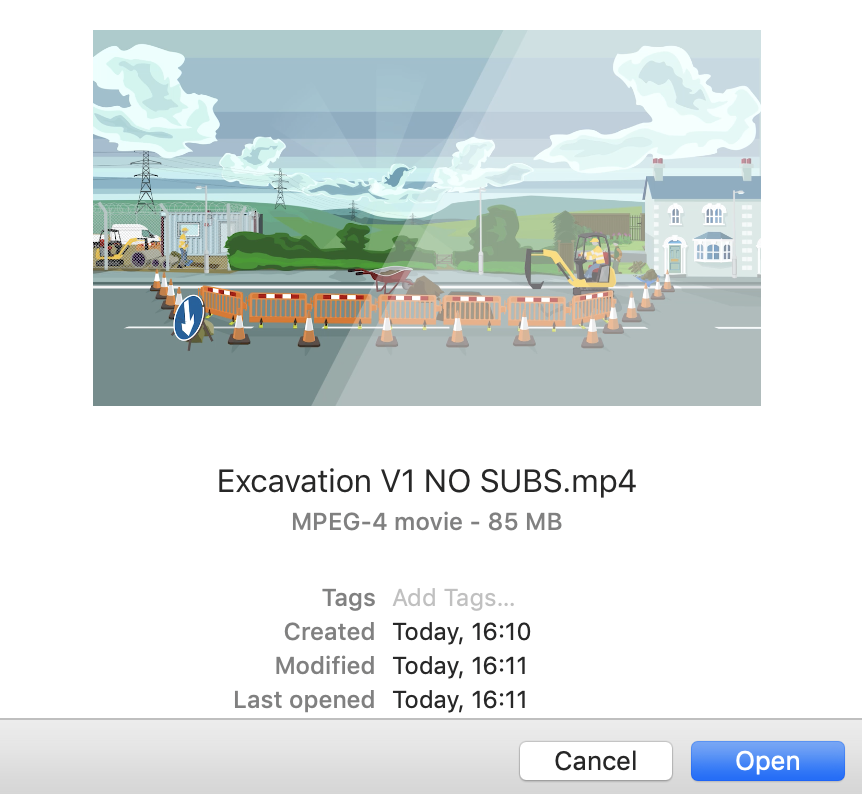
Back to the first gif maker option now.
Import the video you want to use for gif from your mac, and let’s get started.
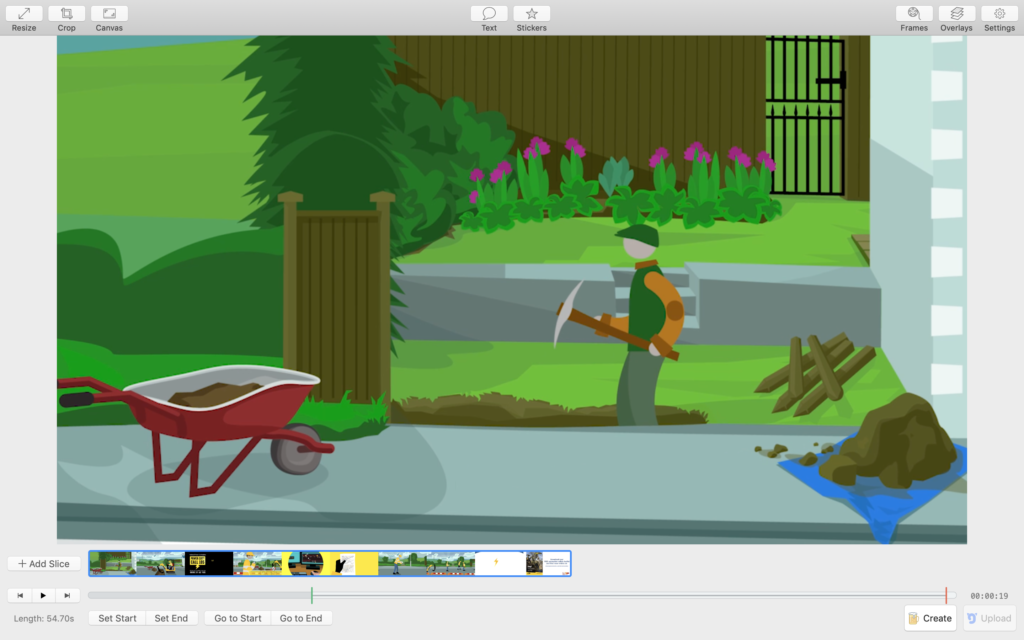
This main screen has a whole range of impressive tools for you to use to make the gif perfect for your requirements.
Let’s take a quick look at each.
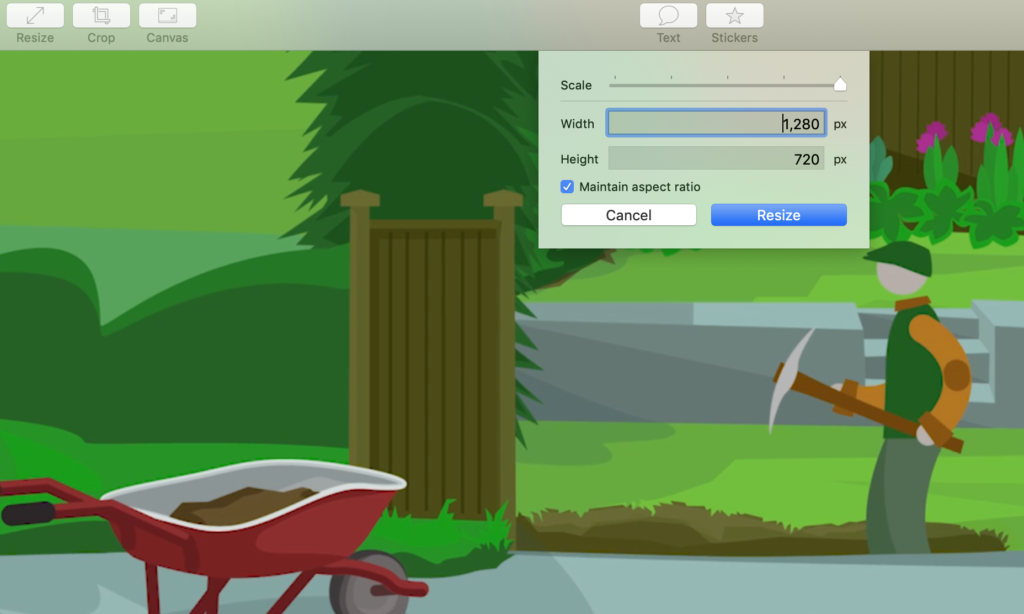
The ‘Resize’ Function:
Find this button in the top left of the display. Use it to adjust the width, height and scale of your gif. There is also a ‘Maintain Aspect Ratio’ function that you can switch on or off depending on the effect you want to create.
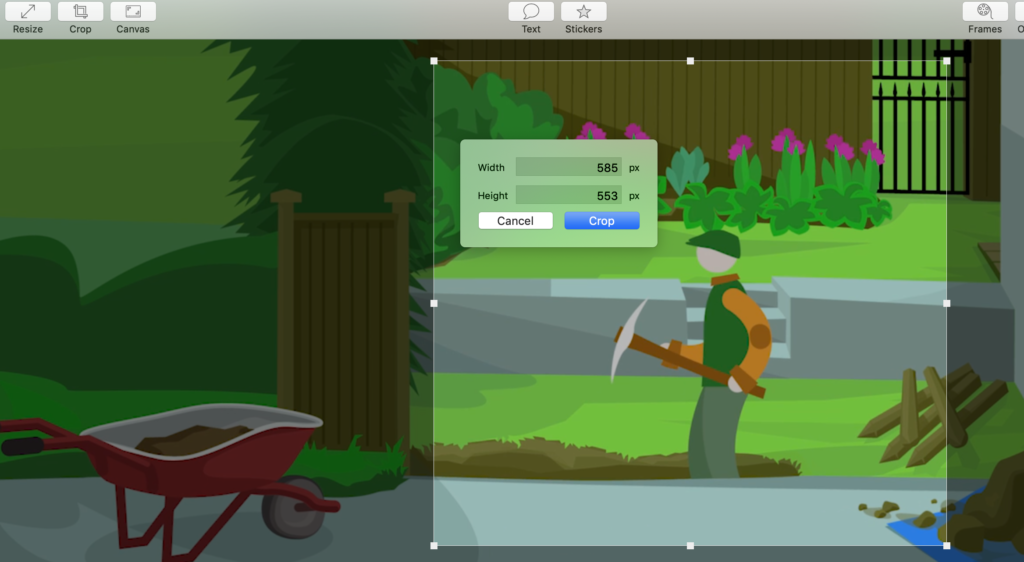
The ‘Crop’ Function:
This is located to the right of the last button. It is simple to use and allows you to hone in on whatever you want to be the focus of the gif. A very useful tool to make the gif clearer and less ‘noisy’, so to speak.
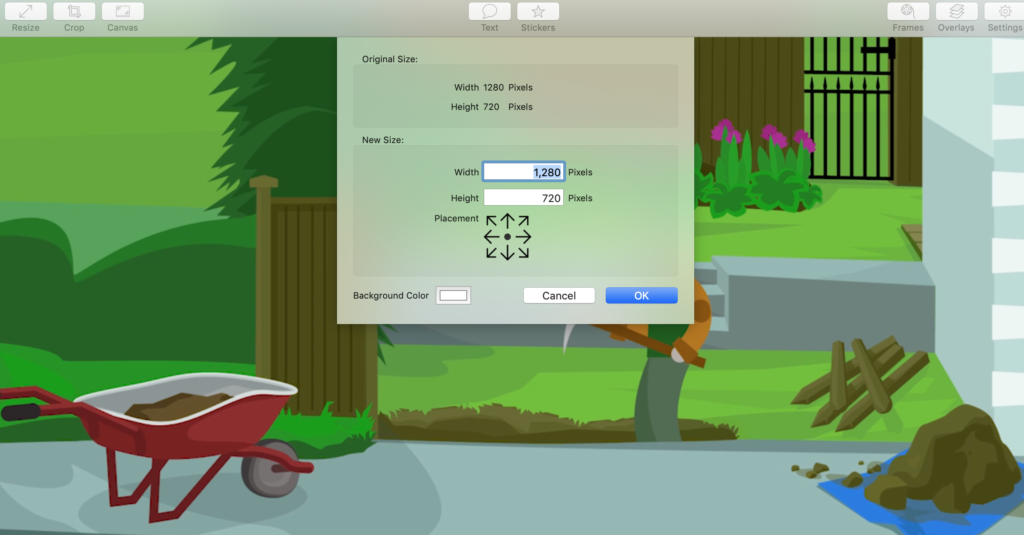
The ‘Canvas’ Function:
This is where you can start to get more creative and think about the look you want your gif to take. Choose a background colour if you know you will be showing it in the gif. By editing the width and height here as well as using the dynamic ‘Placement’ feature you can choose what part of the video you want in your gif.
The ‘Text’ Function:
Moving over to the centre top of the gif display, you’ll see this function which lets you create text to accompany your gif. With a wide variety of fonts to choose from and some other simple but powerful tools for your font, you’ll be well on your way to making a punchy, highly shareable gif.
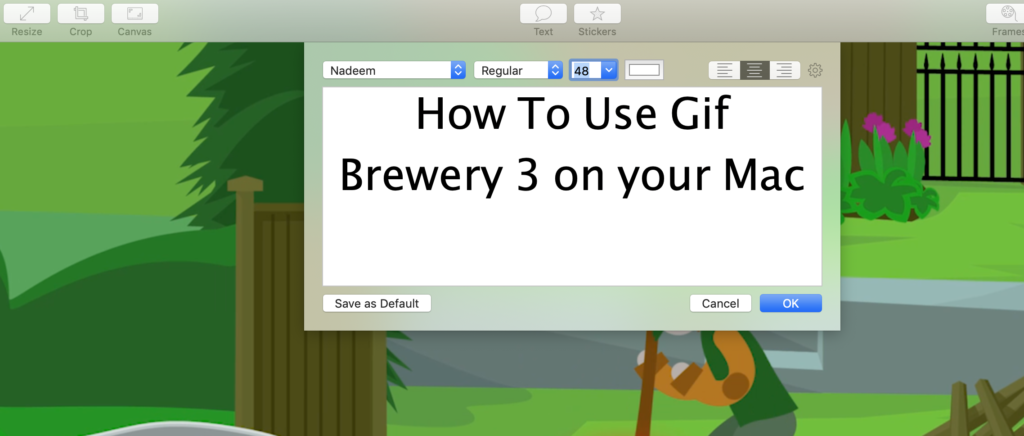
Once you’re happy with your text, choose to save it as default if you think you will want to use it again, then click ‘OK’ to continue. Back on the main display you can now find your text and adjust it to best fit your gif.
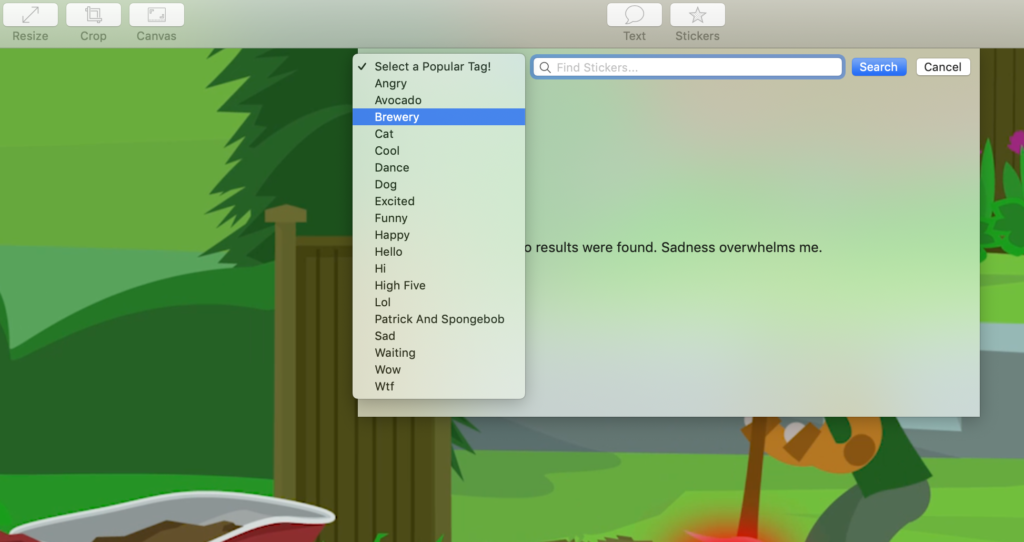
The ‘Sticker’ Function:
To the right of the ‘Text’ button is where you’ll find this great additional feature to add some depth to your gif. Choose from a range of gifs that ‘Gif Brewery’ have made available to you, with some helpful options listed to the left of the popup screen.
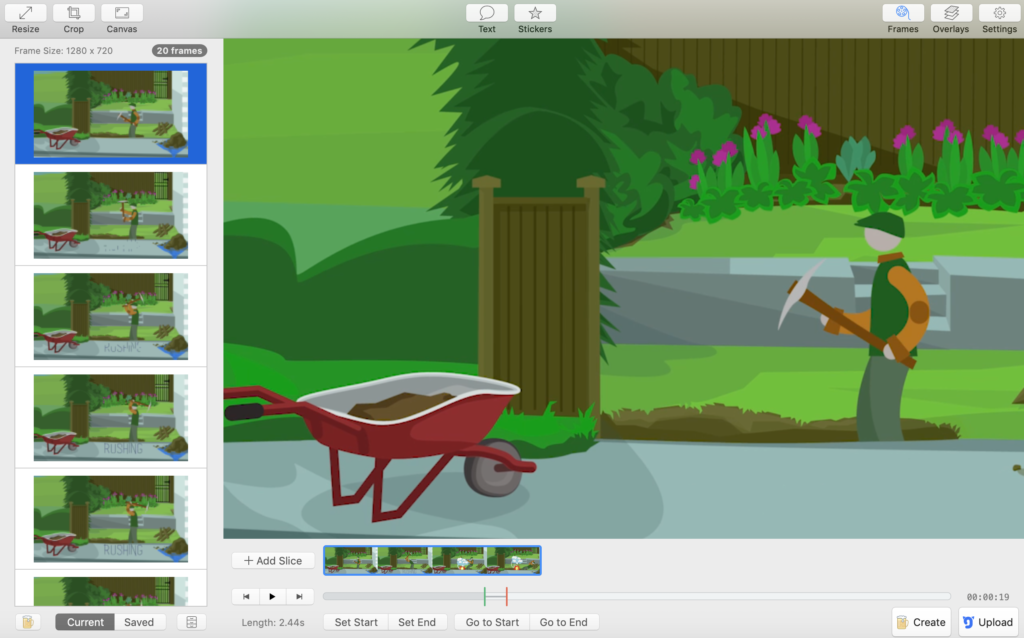
The ‘Frames’ Function:
Towards the top right of the main screen, you’ll see this button. Click it and you’ll find a list of the frames in your video clip to the left of the main screen. Here, you can save these frames to use for later, or view any previously saved frames. A very useful gif maker tool if you want to get real specific about the frame sequence that you want to feature in your gif.
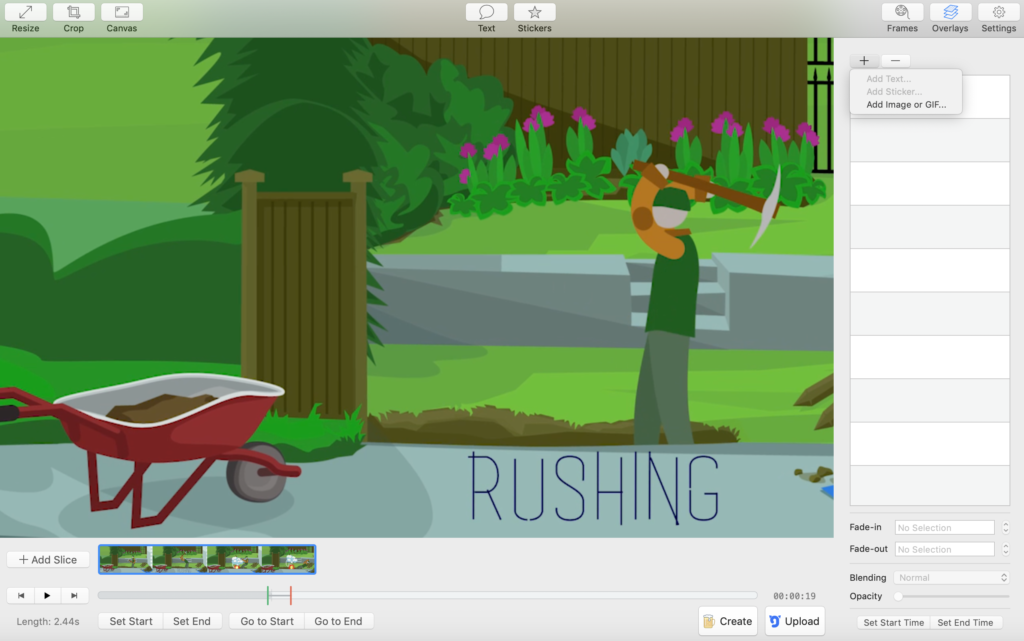
The ‘Overlays’ Function:
The icon to the right of the ‘Frames’ function is another tool you can use to add depth and detail to your gif. Use this tool to add layers to the gif such as an additional image or use it to edit the layers you’ve already added like the text you created earlier. With the ability to set start and end times for these layers, the choice to have them fade in and out of the screen, and the handy option to blend and alter the opacity of each layer, this is where your gif really gets sophisticated.
The ‘Settings’ Function:
Speaking of sophisticated, this function that you’ll find to the right of the screen takes your gif options to the next level. Here you can edit your gif’s colour count and toggle on or off the colour automatic optimisation button depending on your preference.
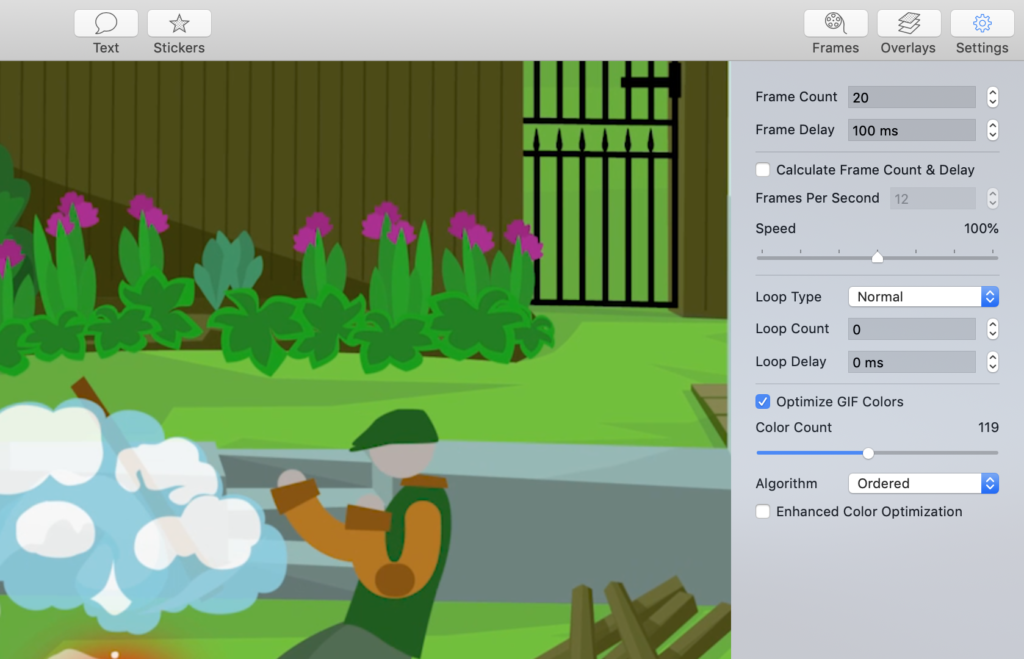
What’s also a very important thing to note here is that this excellent gif maker tool offers you the option to reduce or increase the frame rate of your gif. What you choose for your gif all depends on the effect you want to have combined with the file size you’re aiming for. The most popular frame rate is 24fps as it is the closest view format to the human eye, however, the quality can be improved upon with a higher frame rate. Choose lower than 24fps and you’ll get a choppier effect that may suit your gif quite well and provide as smaller file size at the end.
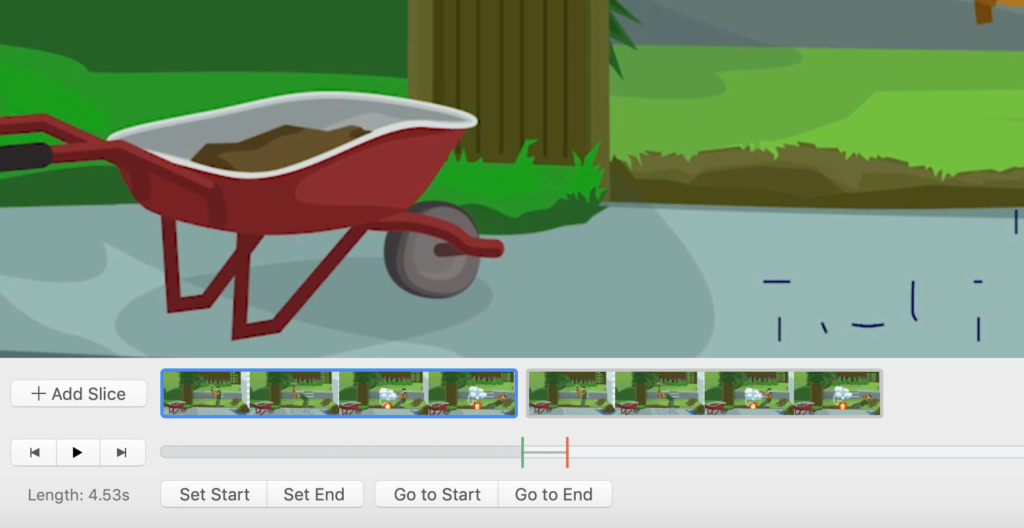
The ‘Add Slice’ Function:
Find this towards the bottom left of the screen. Click this button and it will duplicate the entire section of the video you have selected for your gif. You’ll see this duplicate in the clip bar that runs along underneath the video screen. You now get to use the buttons below that or the green and red sliders on the bar to choose start and endpoints for your gif. Just click one of the ‘slices’ in the clip bar and drag the markers below the clip bar to your chosen points.
Get your gif maker game on…!
Once you’re happy with the way your gif looks, simply click the ‘Create’ button towards the bottom right of your screen. The popup screen that appears allows you to save the gif to your computer, upload it directly to Gfycat, share it in a multitude of ways, or cancel it if you aren’t quite satisfied yet with your gif preview.
Gfycat also provides you with a direct upload button to their site from the main screen if you are just itching to share your creation with the world.
After this tutorial, you have all the information you need to ensure your gif is positively received. Whether you are looking to utilise gifs in your social media community, to complement email marketing & web design or as an educational tool. The option to use personalised gifs in your work is a brilliant option to have in 2020.
Also, if you’re looking for bespoke animation to use for your business – and to possibly turn into gifs – then please check out our awarding-winning UK animation studio. Our inhouse UK team are ready to help in giffy.