If you have pulled your chair up to set up a YouTube channel. Then you’re in the right place. Our clear step-by-step guidelines can get you set up in a jiffy.
Setting up a YouTube channel for the first time can be a bit daunting and annoyingly involved.
To make the most of your channel it’s worth spending time doing a little research, not only on the industry you specialise in but who’ll be your target audience and the competitors you want to stand out from. What type of video do you want to show on your channel? Will it be some marketing animation or is it a tutorial which you will film yourself? Starting to sound scary now?
Relax because once you have a clear objective and all your ideas are safely logged the rest should sail along pretty smoothly. We have broken down the journey into 7 straight forward steps.
Step 1: Sign Up For A Google Account
The first thing you need to do is sign up for a Google account if you haven’t already got one. Once completed sign in.
To create an account for Google, these are the simple steps to follow:
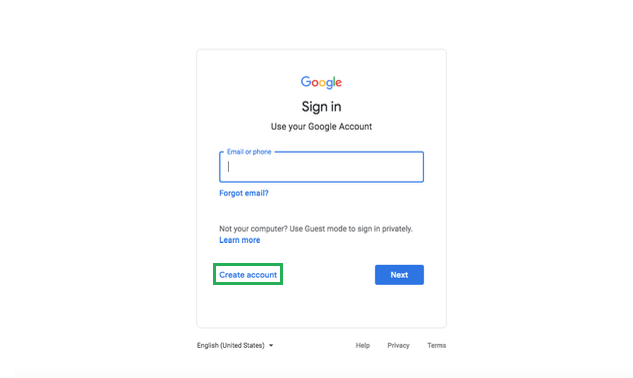
- Simply click on the Create Account option.
- You will be asked to follow a few simple steps to create your Gmail account.
- Now use the account you just made to sign in to Gmail.
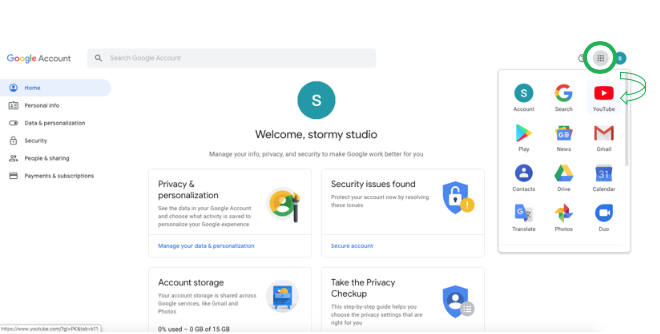
- Sign in to your new Google Account, navigate to the Google App icon and then click on the YouTube icon.
You will be directed to the YouTube homepage where we’ll begin the set up of your YouTube channel. Let’s get started then!
Step 2: Time to Set Up a YouTube Channel
We have officially started with the YouTube journey so head on over to the YouTube site and up in the top right corner, you’ll be able to sign in with your Google account user name and password.
Below are the steps to follow:
- On logging in to YouTube the next thing to do is finding the user icon, which is on the top right.
- Do you see the “create channel” option? Great! Click on it and proceed.

You now will be asked to pick a name for your channel, which you might have in mind already. Write the channel name and click on “create” to finish.
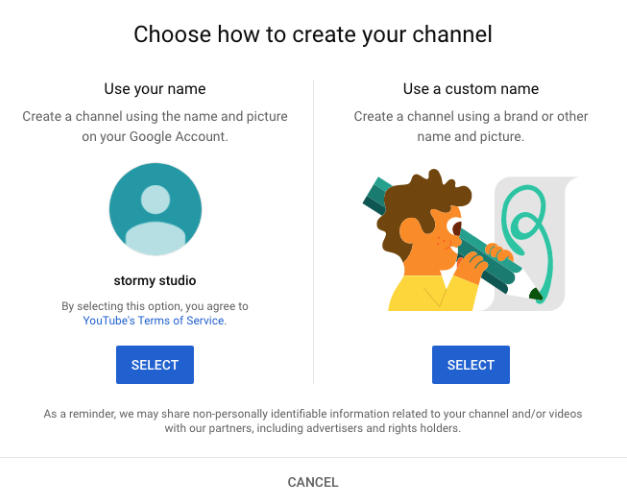
Note: You can either use your Google Account name and picture or can go for a custom name.
It may help to follow the images shown above to check you are on the right track.
Step 3: Fill out the YouTube channel details
YouTube is a huge platform and millions of channels are being set up on a daily basis. There will be competition so if you want your YouTube channel to stand out you will have to spend some time at this stage in making it look absolutely irresistible to your target audience.
Make your YouTube channel distinguishable from the rest. What profile picture would act as an identity for your brand?
Select A Profile Picture for Your YouTube Channel
Click on “upload picture” and choose a picture from your computer to set up your YouTube profile picture.
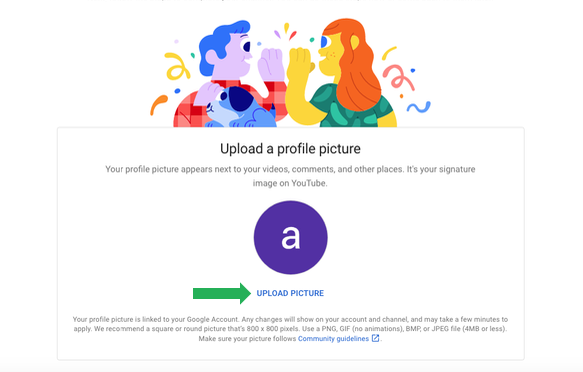
Your profile picture could be your brand logo. A logo is the emblem of a brand that not only reflects the idea and thoughts behind your business but also gives you a chance to stand out from the rest. It will also make your channel look more professional. An audiences glance will be fleeting so make sure to craft a logo that is not only eye-catching but also creates a great first impression.
Adding A Description to Set Up YouTube Channel
In the same way, you would add a bio on your Facebook and Instagram account, you need to add a description or bio to set up a YouTube channel. This should be a window into your channel, what people can get from your videos what makes you special and unique. In other words, why to follow and watch your videos.
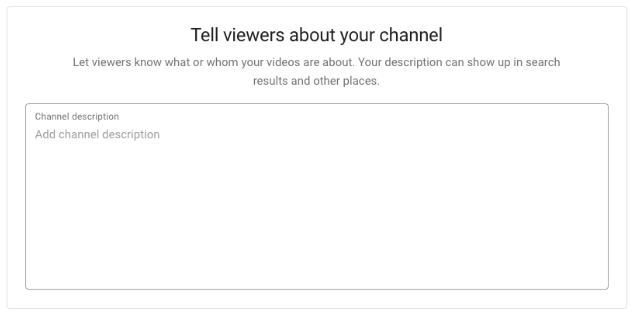
Do not forget to add useful and important information in this description, such as where you are located and your email address.
Now Add Links for Your Website and Social Media Accounts
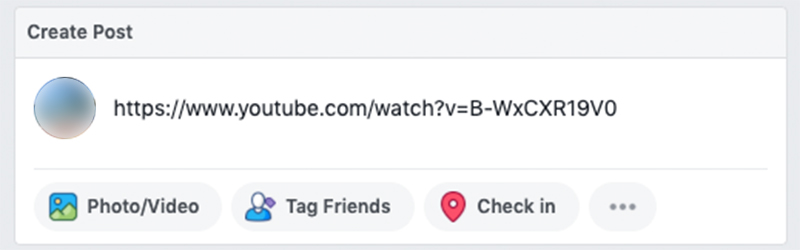
Not everybody will find your YouTube channel so you need to talk about it on other platforms. You have worked hard on your videos so why not show them off? It’s advisable to have accounts on most if not all other social network sites. This way you can shout from the rooftops about how great you are.
Cut and paste the URL from either your YouTube channel or from a specific video with a catchy tagline or anecdote to funnel people through.
You can, of course, put your YouTube videos up on your official website, making it the first thing people see when visiting, or post it in the blog area along with an article. Try to ensure that you write a creative and appealing blog matching the video content and upload it below the write-up. No coverage is too much to drive people towards your channel and brand.
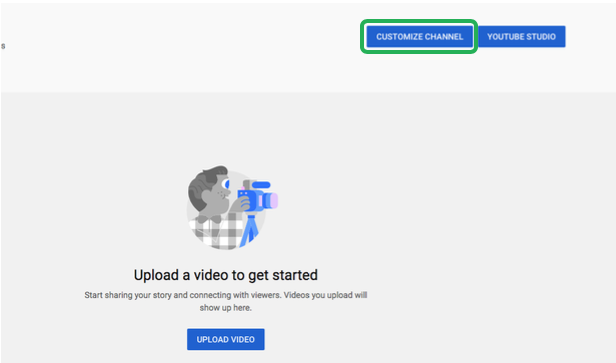
Step 4: Customize Your YouTube Channel
The next step to set up your YouTube channel is to customise it by clicking on the “customise channel” option.
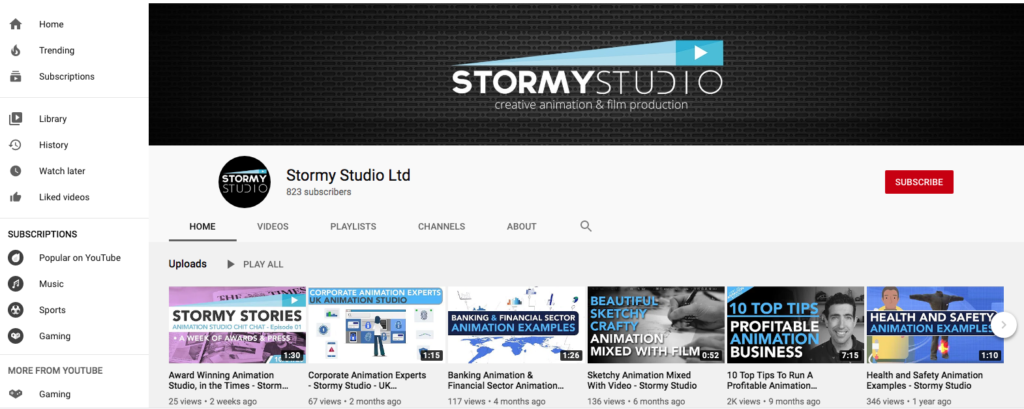
Time for The Fun Part: Add A Channel Art
Introduce your YouTube channel by making it look unforgettable with the use of some cool art.
Yep, similar to a Facebook cover photo! It is up to you whether you want the cover photo to be extravagant or minimal but be sure to be as creative as you can because this is probably the first thing your customers will encounter of your YouTube channel.
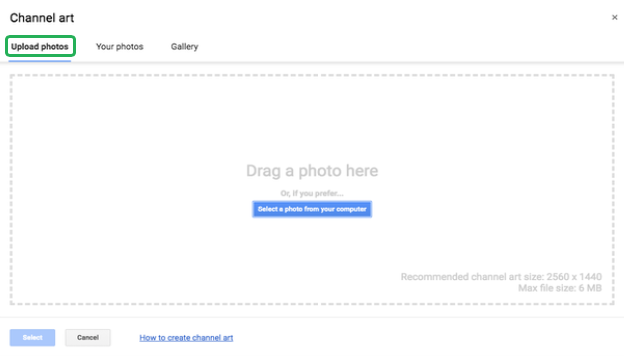
- Click on “Select a photo from your computer” or drag a photo from your computer to upload a photo.
- Likewise, you can also choose any photo you want from your gallery or Google photos.
Once you’ve uploaded a picture you will see a preview of your cover art on different devices, such as a smartphone, laptop, desktop, etc.
Note: To set up a YouTube channel cover photo should be 2560 x 1440 pixels with a file size no more than 4MB.
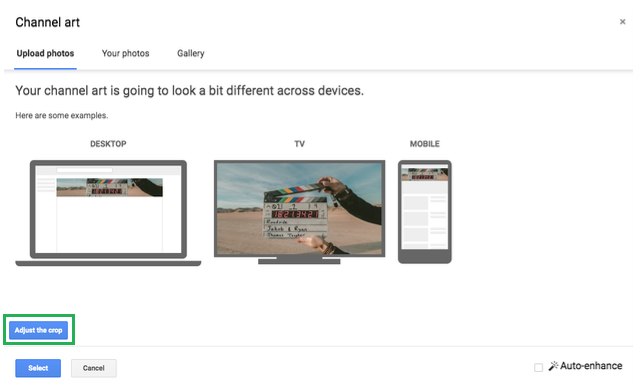
If you feel like the cover photo needs a little trimming, you can select the “adjust the crop” option from the bottom left of the page.
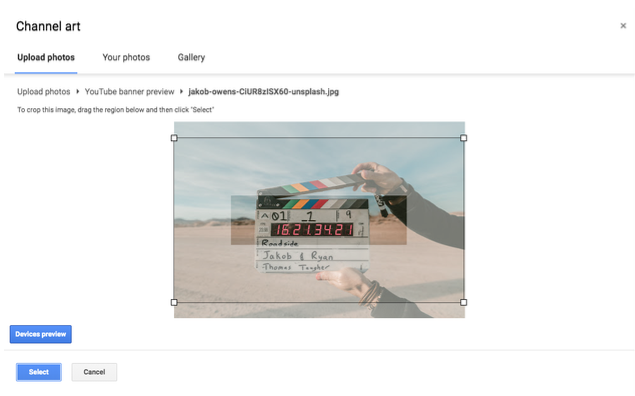
This is the fiddly part but trust me, it is all worth it. As soon as you have adjusted the crop, it’s time to move to the next step.
Step 5: It’s Time To Upload Your First Video
Congratulations, the big moment is here. You are about to set up your YouTube channel. Assuming you have made your video, edited it accordingly and added some soothing or rejuvenating music for max effect, lets crack on with uploading the first video.
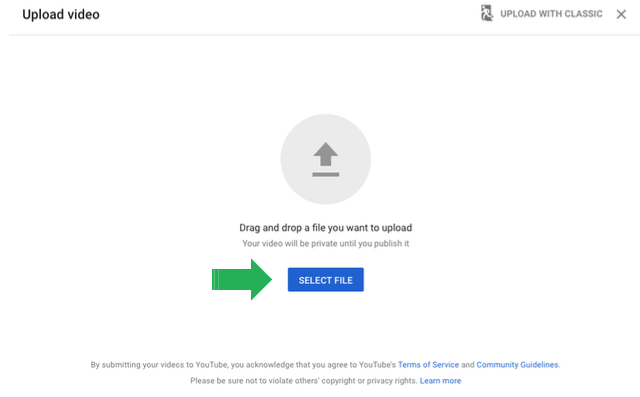
On the Home tab, you will see an “upload a video” option, click it.
Follow the picture below for clarification.
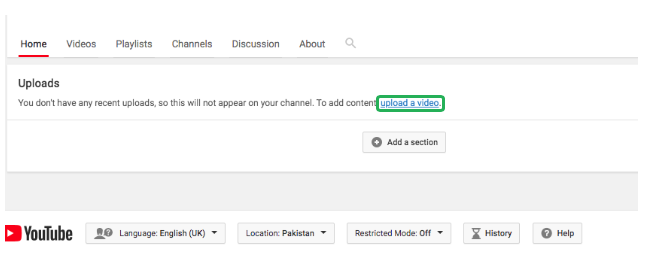
You will be asked to select a file from your computer, drag-drop and your video is uploaded.
Step 6: Optimise Your First Video
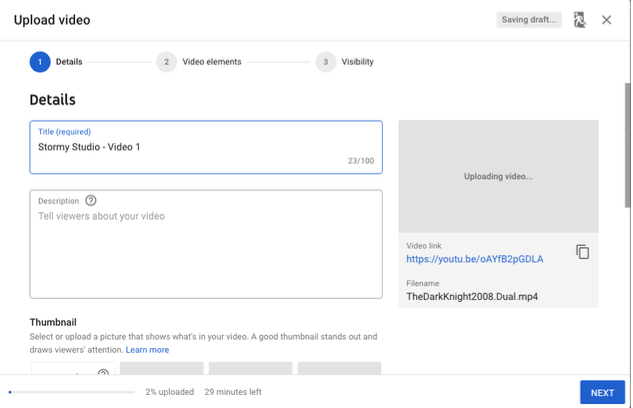
When uploading a video on YouTube, you are asked to fill some blank spaces, such as title, description, and tags. Remember that these are essential components that will allow your video to be easily discovered. Don’t skip them because they are significant.
As with websites, YouTube has its own set of parameters for optimising videos. Use keywords that best describe your business and the video you have uploaded so it reaches as many relevant portals as possible.
Note: A keyword-rich title and description will go a long way when it comes to set up a YouTube channel.
Take care and time here. YouTube has strong integration with Google and if you tweak your keywords in an opportune way, your video will rank well on Google as well as YouTube.
The following points will assist you in optimising your first video.
Adding Title to Your First Video:
Titles are really important when it comes to videos as they give an idea of content in 3 to 6 words. Try to be concise and short. Long titles are never a great idea as viewers can find them boring and unappealing.
Adding Description to Your First Video:
In order to assist with YouTube’s search and discovery system add a description that further explains the content in your video. Make use of keywords to describe what the video is about, which is great for YouTube’s algorithm. Try to keep the keywords in the first sentence.
Note: You also add links to your website and social media platforms in the description area to set up a YouTube channel especially for business purposes.
Select A Thumbnail for the Video:
To give a more professional look to your newly created YouTube channel, it is important to select a thumbnail for every video you upload.
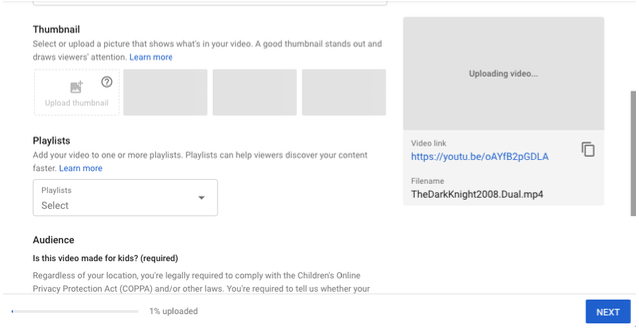
YouTube will offer you a default thumbnail from stock. You could create a custom thumbnail a little later when you are a pro in the YouTube industry.
Keep in mind that we live in a mobile dependent era where half of your audience will be watching you on their smartphones. Adding a thumbnail from the suggested ‘YouTube’ should be done with full consideration. Make sure whichever you choose is clear on the mobile screen as well.
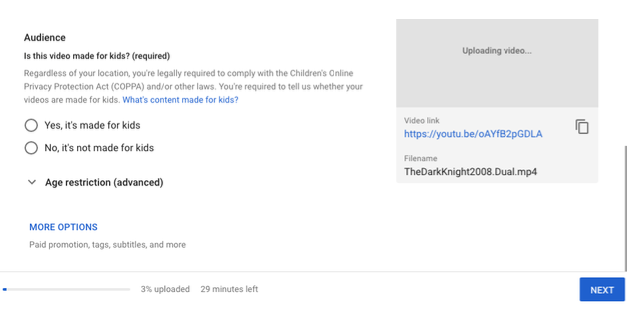
- If you are done, click on the “next” option to proceed to the final step to set up a YouTube channel.
- Select the audience from the “audience” section. If there are age restrictions, please add that as well.
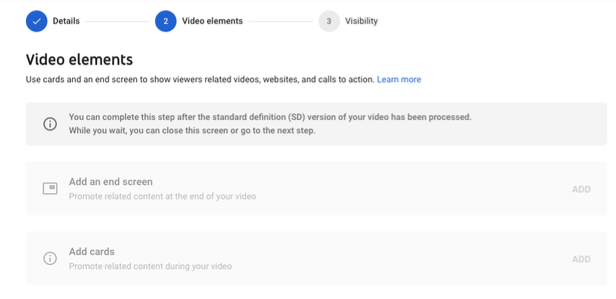
Once you’re done with your video details, next is video elements.
You can select the “Add and end Screen” or “Add cards” option to add related content with your videos.
And this brings us to the final step to set up a YouTube channel, which is choosing who can view your video.
If you want to go for it and put your video out to the maximum amount of people go with the “public” option.
However, if you are on a test and trial situation and are not yet ready to show it to the world, then there also is a “private” option for you.
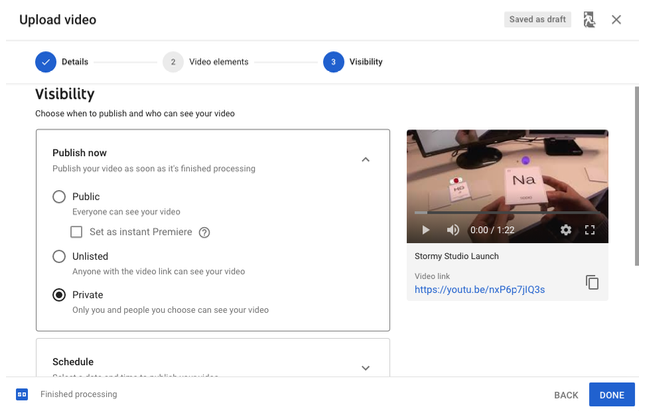
Click “done” to get done with your first video release.
Step 7: Publicise Your YouTube Channel
After your first video is processed it is time to revise the information from the title to the thumbnail, so you do not miss anything important. Remember all that competition.
Follow these steps to review the video:
- Review the information once again. You can add anything that is left or cut the extra details.
- Now select the “Videos” from the “Creator Studio” in the top right corner.
- You can view all of your uploaded videos here.
Congratulations! You have successfully set up a YouTube channel
You are the proud owner of your very own YouTube channel. Not only do you know how upload videos but you can polish each one for max discoverability. Good work!
So go, be free YouTubers and create amazing and engaging YouTube videos. Please comment below with your stories of success or woe and we’ll help out in anyway we can.
Hopefully, this step by step walkthrough on how to setup a Youtube channel has been helpful.
Whilst you’re here, why not check out our UK Animation Studios business animation work. Perhaps we can help you with content for your channel or an ident in the future.
We love to help bring marketing message to life with a big dollop of style. Using bespoke motion graphics, character animation, visual FX and film.
Plus if you’re interested in receiving a variety of free guides and tips from industry professionals on how to make the most of animation and video for your business, please complete the below form.